How to Remove the Background from an Image in Premiere Pro (2026)
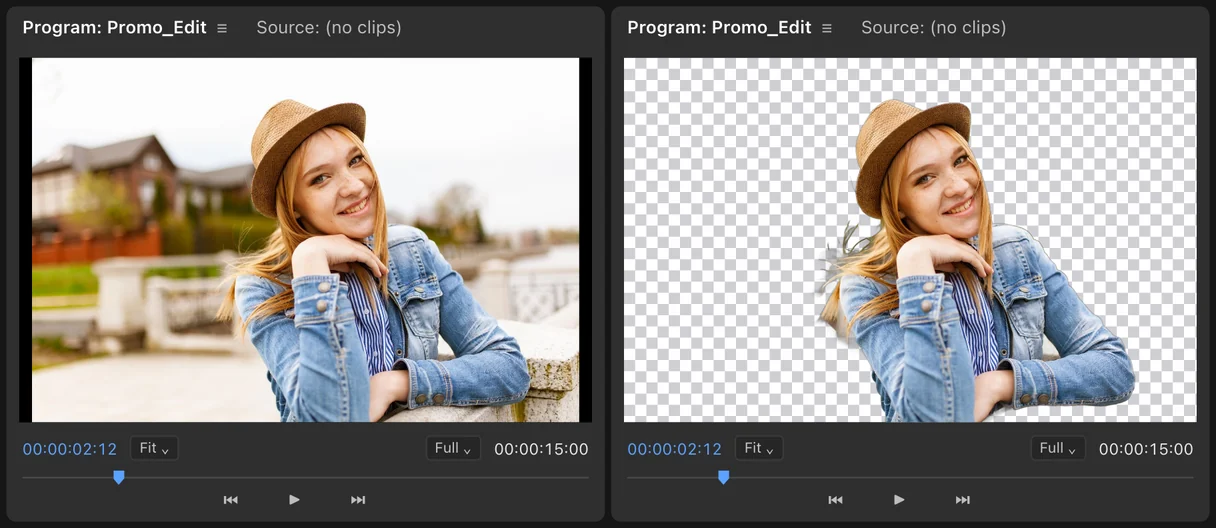
To remove the background from an image in Premiere Pro, you have three built-in routes and one shortcut. Ultra Key works if the photo was shot on a solid green or blue backdrop. Object Mask (Premiere 26.0 and later) can mask a subject and hide the rest. For anything else, editors send the photo to Photoshop or a website, cut it out there, and bring a PNG back. Vanish BG skips the trip: select the image clips on your timeline, click once, and the cut-outs replace them at full resolution.
You hit this on every second project. A product shot on a white table for an ad. A headshot for a lower third. A logo someone sent as a JPG with a white box around it. This guide covers what Premiere can do with a still, the round trips, the transparency trap that catches everyone once, and the one-click way.
What Premiere's own tools do with a photo
- Ultra Key (Effects, Keying) removes a single colour. It's made for green and blue screens. On a white or busy background it eats into the subject: white shirts, highlights and reflections go with it.
- Object Mask arrived in Premiere 26.0. Pick the Object Masking tool, hover over the subject until it highlights, and apply the mask to Opacity. Adobe built it for moving footage (it tracks the subject frame by frame), and its own tutorial notes a slight dark edge you may need to fix with feather and expansion. The result is a mask on that one clip, not a transparent image you can reuse in other sequences or projects.
- Crop and shape masks work for simple shapes, like cutting a phone screen out of a mockup. Hair, fur and product edges need more.
After Effects has the same keyers plus Roto Brush, which is also made for footage.
| Method | Where it runs | Best for | Cost | The catch |
|---|---|---|---|---|
| Ultra Key | Premiere and After Effects | Green or blue screen photos | Included | Only one solid colour |
| Object Mask | Premiere 26.0 and later | Moving subjects in video | Included | A mask on one clip, edges need work |
| Photoshop Remove Background | Photoshop | Any photo | Photoshop subscription | Round trip, PNG re-import |
| remove.bg and other sites | Browser | Any photo | Pay per HD image | Upload, download, re-import |
| Vanish BG | Premiere and After Effects | Any photo on your timeline | $39 once | Stills only, not video |
Method 1: the Photoshop round trip
- Open the photo in Photoshop. In Premiere, select the image in the Project panel and choose Edit, Edit in Adobe Photoshop.
- Remove the background. In the Properties panel, click Remove Background under Quick Actions. Photoshop adds a layer mask.
- Fix the edges with Select and Mask if hair or soft edges need it.
- Save as PNG or PSD. Not JPG (see below).
- Import the new file into Premiere and replace the old clip on your timeline.
Each photo is a trip. A slideshow of 40 product shots is 40 trips.
Method 2: a background-removal website
Upload, wait, download, import. It's quick for one image. The free download on most sites is a smaller preview, and full resolution costs a credit per image. The photo is also uploaded to someone else's server, which embargoed products and NDA work often don't allow.
The JPG trap
JPG can't store transparency. If you cut out a JPG and save it as a JPG, the background comes back as white (or black). Save cut-outs as PNG, PSD or WebP with transparency, and import that file. If a client sends a logo as a JPG with a white box, that's why.
Method 3: one click on your timeline
This is what Vanish BG does.
- Install Vanish BG with the free aescripts + aeplugins Manager app and open the panel.
- Select the image clips on your timeline. It takes .jpg, .jpeg, .png and .webp.
- Choose where the result goes. Replace in place swaps each clip for its cut-out, so the edit keeps its timing. Export to bin drops the cut-outs in your Project panel for reuse.
- Click Process Selected Clips.
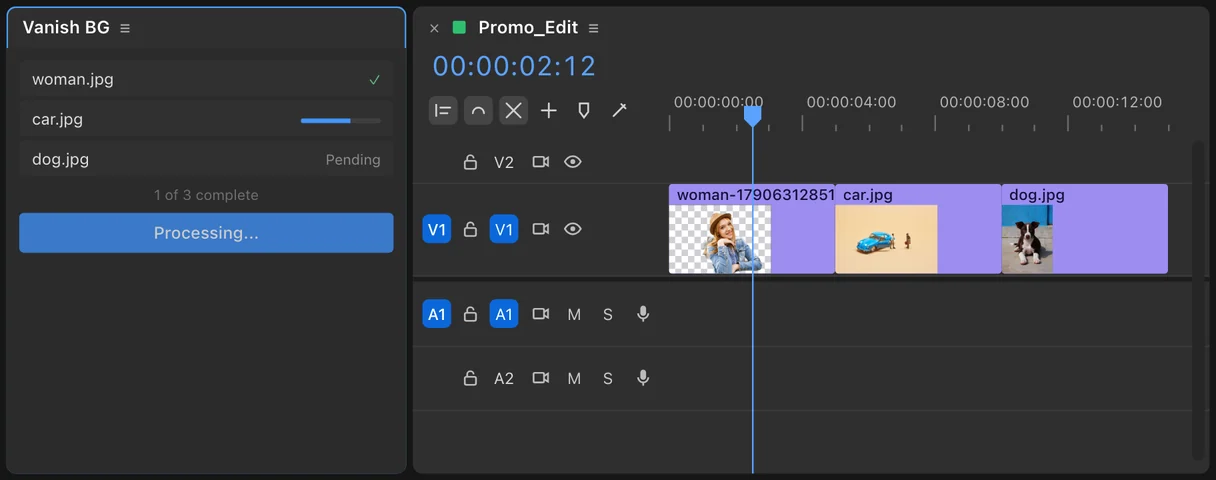
The cut-outs keep the original resolution, and the processing runs on your computer, so nothing is uploaded and there's no per-image fee. The cut-out is a real transparent image file, so it works in any sequence, in After Effects, or in the next project.
Tips for cleaner cut-outs
- Start from the original photo, not a screenshot or a compressed copy from a chat app.
- Contrast helps. A subject that stands apart from its background cuts out cleaner than a grey product on a grey wall.
- Check fine edges at 100% (hair, fur, glass) before you export the edit.
- Add a soft shadow under a cut-out product (a blurred, darkened copy below it) so it doesn't look pasted on.
What about video?
Vanish BG is for photos and other stills. For a person moving through a shot, use Premiere's Object Mask, or shoot on green or blue screen and use Ultra Key.
Frequently asked questions
Can Premiere Pro remove the background from a picture? Partly. Ultra Key removes a solid colour, and Object Mask (26.0 and later) can mask a subject. To get a clean, reusable cut-out of any photo, you need Photoshop, a website, or an extension like Vanish BG.
How do I remove a white background from a logo in Premiere? Try Ultra Key with the key colour set to white if the logo has no white in it. Otherwise cut it out properly and save it as a PNG.
Why does my cut-out have a white background in Premiere? It was saved as a JPG, which can't hold transparency. Save as PNG, PSD or WebP.
Does Vanish BG upload my images? No. The background removal runs on your computer. The license needs an internet connection the first time you activate it.
Which versions does it support? Premiere Pro and After Effects CC 2022 and newer, on Mac and Windows.
Is there a free trial? Yes, from aescripts + aeplugins. There's also a 30-day money-back guarantee.
Sources
- Adobe: Remove a background with Object Mask in Premiere
- Larry Jordan: Adobe updates masking in Premiere 26
- Adobe Community: Object Mask in Premiere Pro 2026
Adobe, Premiere, After Effects and Photoshop are trademarks of Adobe. remove.bg is a trademark of its owner. vogeledits is not affiliated with Adobe. Prices checked October 2026.